How to implement a custom device#
Info
This guide is about how you can implement a custom device in Python. This allows you to develop your own device logic.
 1. Get the documentation#
Danger
The device documentation is essential for implementing your custom device. Please get an overview and keep the documentation ready during development.
 2. Lookup the interface#
Abstract
To implement your custom device, you must know the device class of your custom device and open the corresponding documentation from Measmatic at GENERICDEVICE, e.g. SMU. If your device does not fit any of the existing device classes, use the device class Generic. A generic device has no predefined methods, so you are free to define your own.
Tip
In the documentation you can see which methods are implemented in the device class in order to use or overwrite them. Please make sure to name your methods in the same way if you want to make an individual implementation.
 3. Create device class#
Example
Please open Visual Studio Code and create a Python file in the Libraries\Instruments folder of the Measmatic data directory, e.g. Libraries\Instruments\Custom\my_device.py. First you have to define a configuration. Set your device class there, e.g. Generic, together with a caption and the supported communicators. Then define a class that inherits from the device class. Measmatic finds both classes automatically.
In this guide we implement a minimal custom device. It is connected via TCP/IP and only understands the standard SCPI commands *IDN? and *RST.
from measmatic import CommunicatorType, Device, DeviceConfiguration


# Configuration
class MyDeviceConfiguration(DeviceConfiguration):
    """Configuration of the custom device."""

    def __init__(self):
        super().__init__("Generic", "My device", CommunicatorType.TCP_IP)


# Device
class MyDevice(Device):
    """Custom device class."""

    def __init__(self):
        super().__init__()

        self.device_configuration: MyDeviceConfiguration

    def initialize(self):
        pass
 4. Select interpreter#
Tip
To view the supported methods and use autocompletion, you must load the Python interpreter from Measmatic into Visual Studio Code. Visual Studio Code > Select Interpreter > Select Interpreter Path // TODO: Show interpreter path
 5. Implement your device#
Example
Now implement the logic of your device. In this example, initialize reads the identification of the device and reset puts the device into its default state. This is what the sample implementation now looks like.
Tip
Don't forget to use the prepared methods, such as initialize, query, send_line, receive_line etc. as you can see in GENERICDEVICE. You can also throw an exception if unexpected behavior occurs. This is already supported in Measmatic.
from measmatic import CommunicatorType, Device, DeviceConfiguration


class MyDeviceConfiguration(DeviceConfiguration):
    """Configuration of the custom device."""

    def __init__(self):
        super().__init__("Generic", "My device", CommunicatorType.TCP_IP)


class MyDevice(Device):
    """Custom device class."""

    def __init__(self):
        super().__init__()

        self.device_configuration: MyDeviceConfiguration

    def initialize(self):
        self.identification_raw_string = self.query("*IDN?").strip()
        self.identification_caption = self.identification_raw_string

    def reset(self):
        """Resets the device to its default state."""

        self.send_line("*RST")
 6. Setup your device#
Info
Now connect your device, install any necessary drivers and configure the device as you need it.
 7. Initialize your device#
Tip
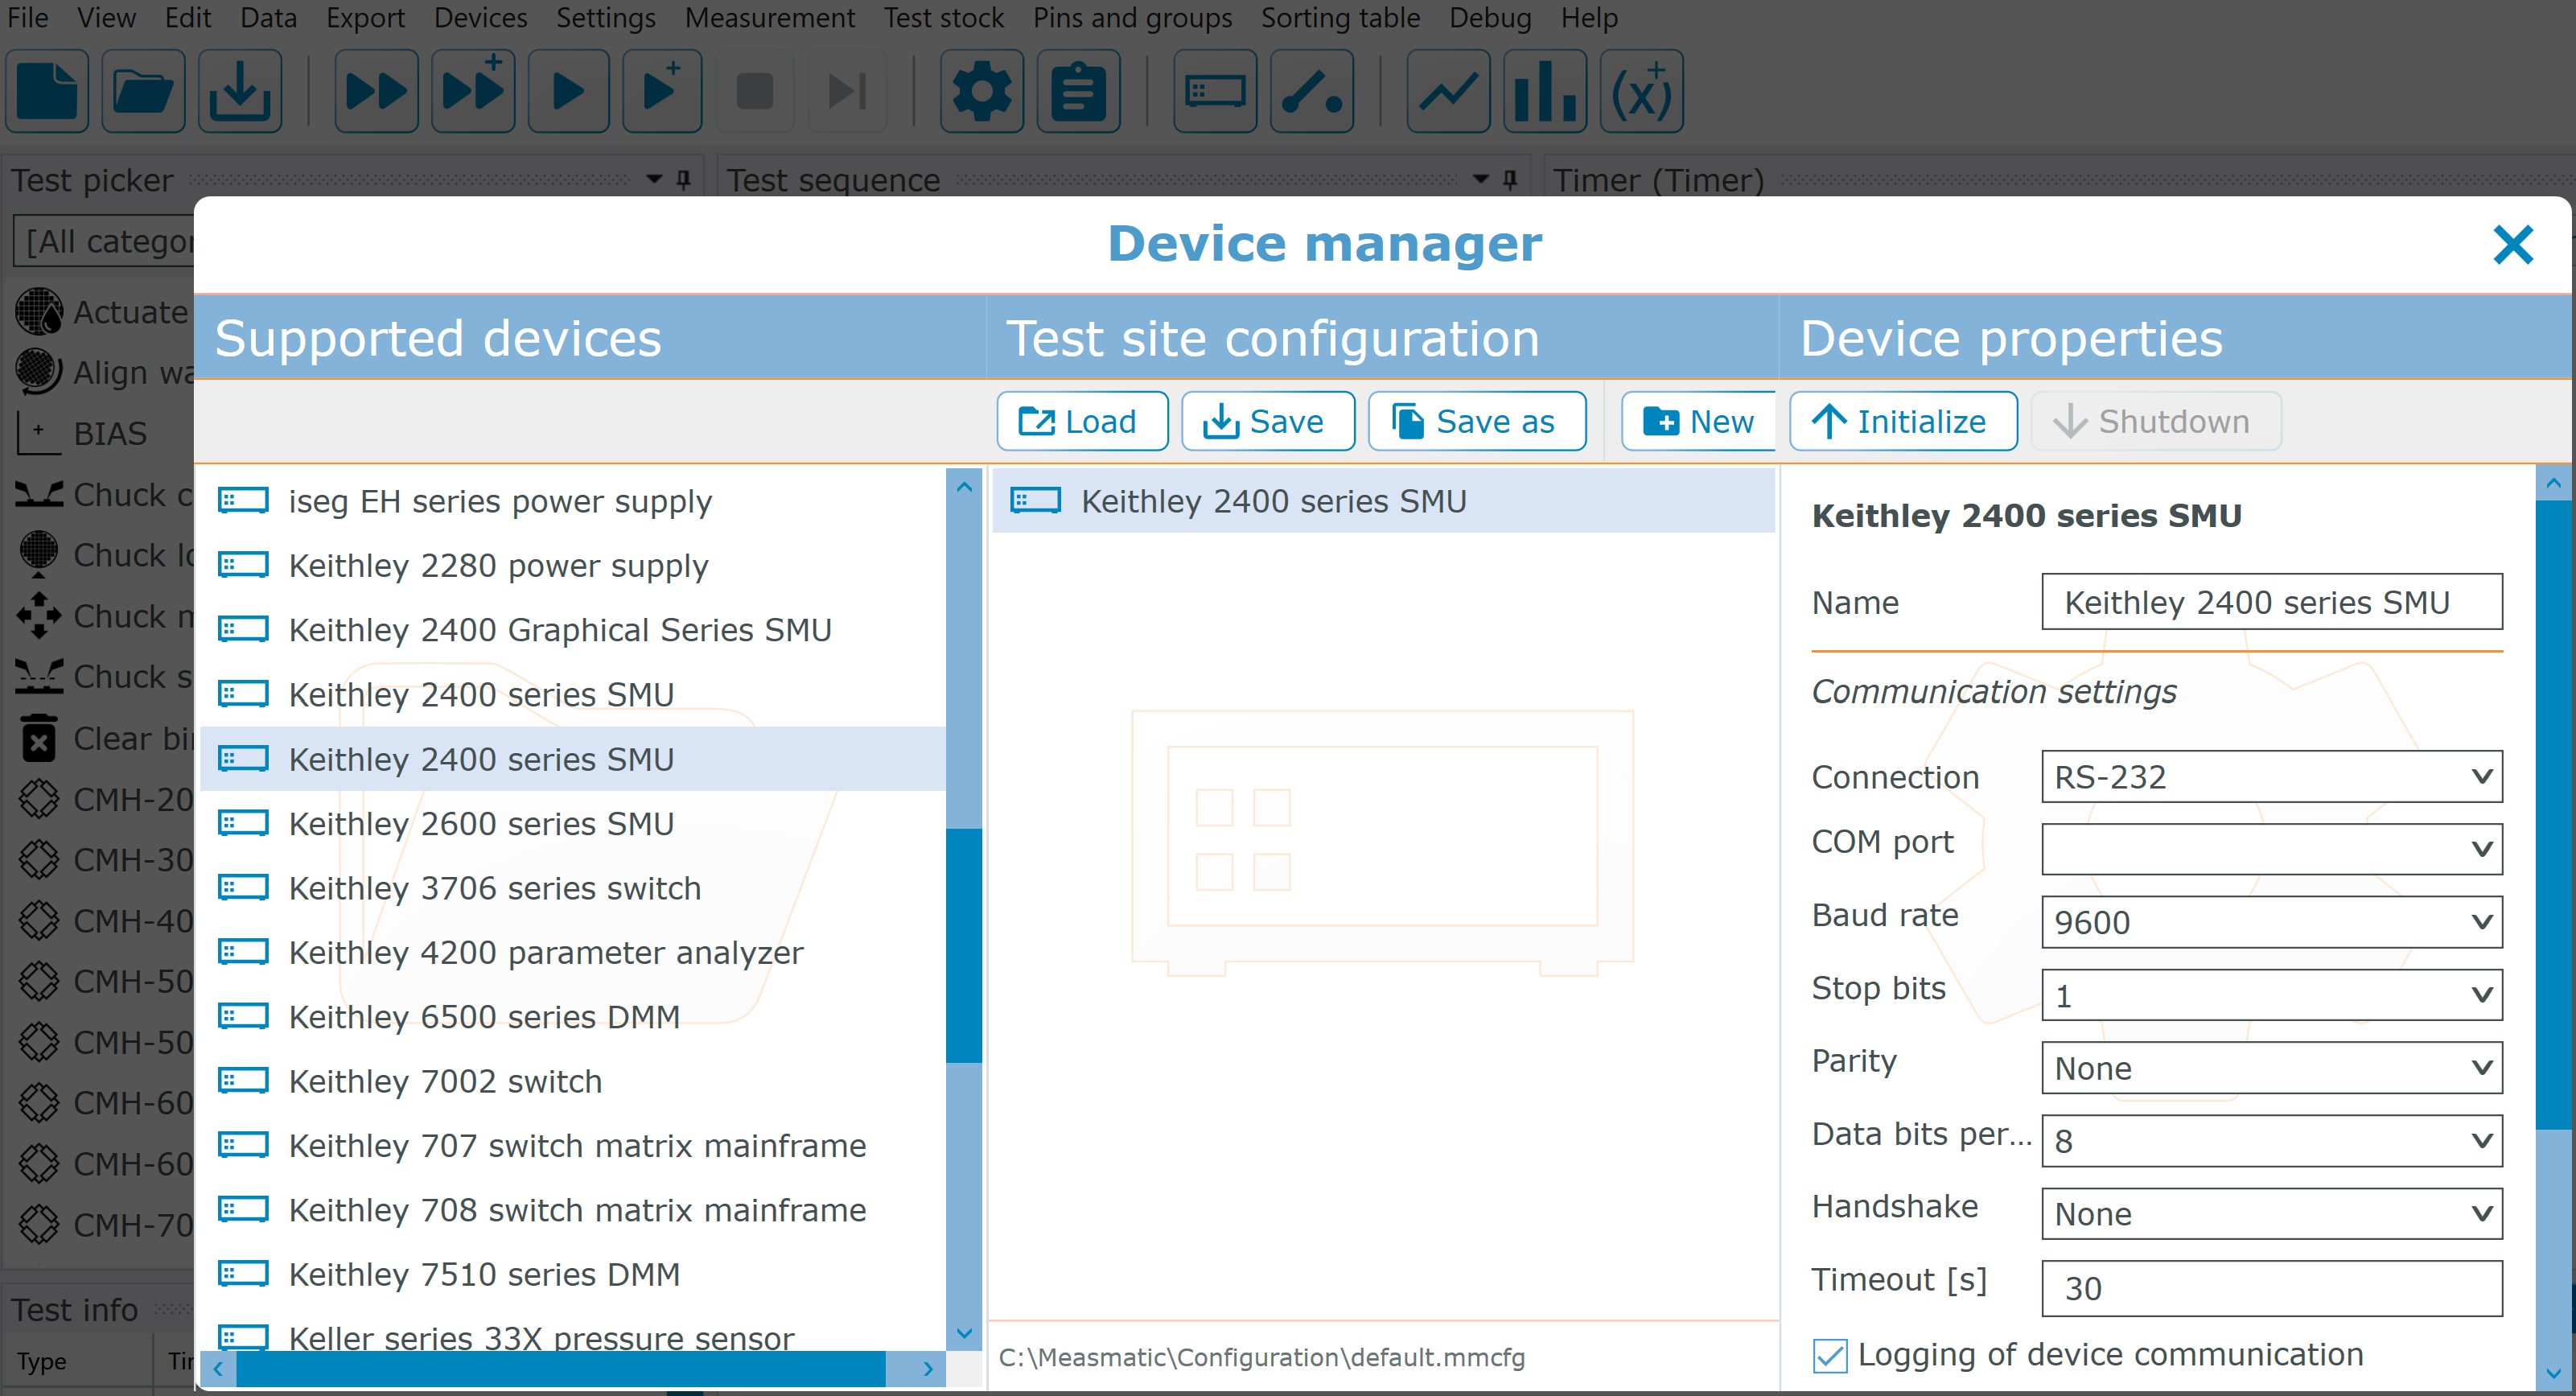
Now open the device manager in Measmatic. There you can select your device, mirror the configuration and initialize the device.

 8. Test your custom device#
Success
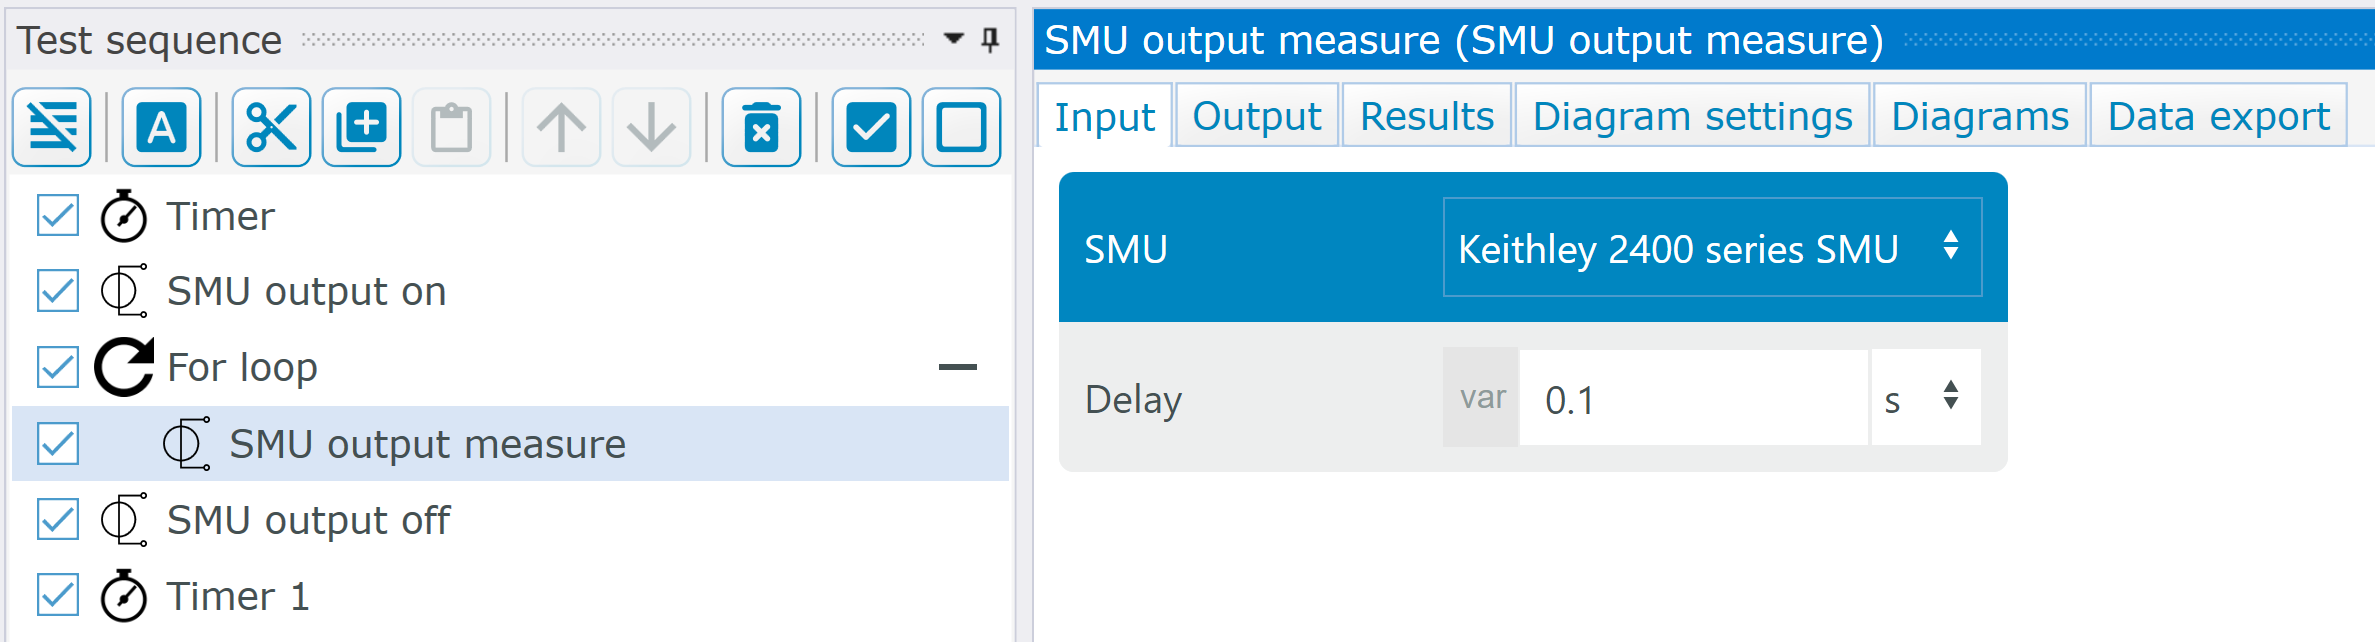
Now create a test sequence in a project that contains device that you have previously implemented in Python. Then execute the test sequence and check whether the application and the behavior work correctly.
9. Test your device in a custom test#
Success
Now create a new test and import your device. Request the device with the name you gave it in the device manager and call its methods.
from measmatic import TestInterface
from Instruments.Custom.my_device import MyDevice


def test(measmatic: TestInterface):
    device: MyDevice = measmatic.get_device("my_device")
    device.reset()

    print(f"Connected to {device.identification_caption}")